
How to embed a 3D model viewer in your medical website & app (iframe guide)
Share:
Copy link
Share via Telegram
Share on Facebook
Share on LinkedIn
Share via WhatsApp
Share on X
Share via Email

Table of contents
Planning to add a 3D anatomy model viewer to your website, app, or LMS? Then, you’re probably wondering how difficult the integration process will be.
Many teams assume that embedding interactive 3D content requires long timelines and rebuilding existing pages. In reality, a professional 3D viewer can be deployed through simple iframe integration with minimal technical effort.
In this guide, we discuss how a 3D viewer works, what’s included, and why users like it.
What is an embeddable 3D viewer?
An embeddable 3D viewer is an interactive 3D application that can be placed directly into your website or application using an iframe.
It allows users to explore 3D models inside your existing platform. This means you don’t need to redirect people to another website or app.
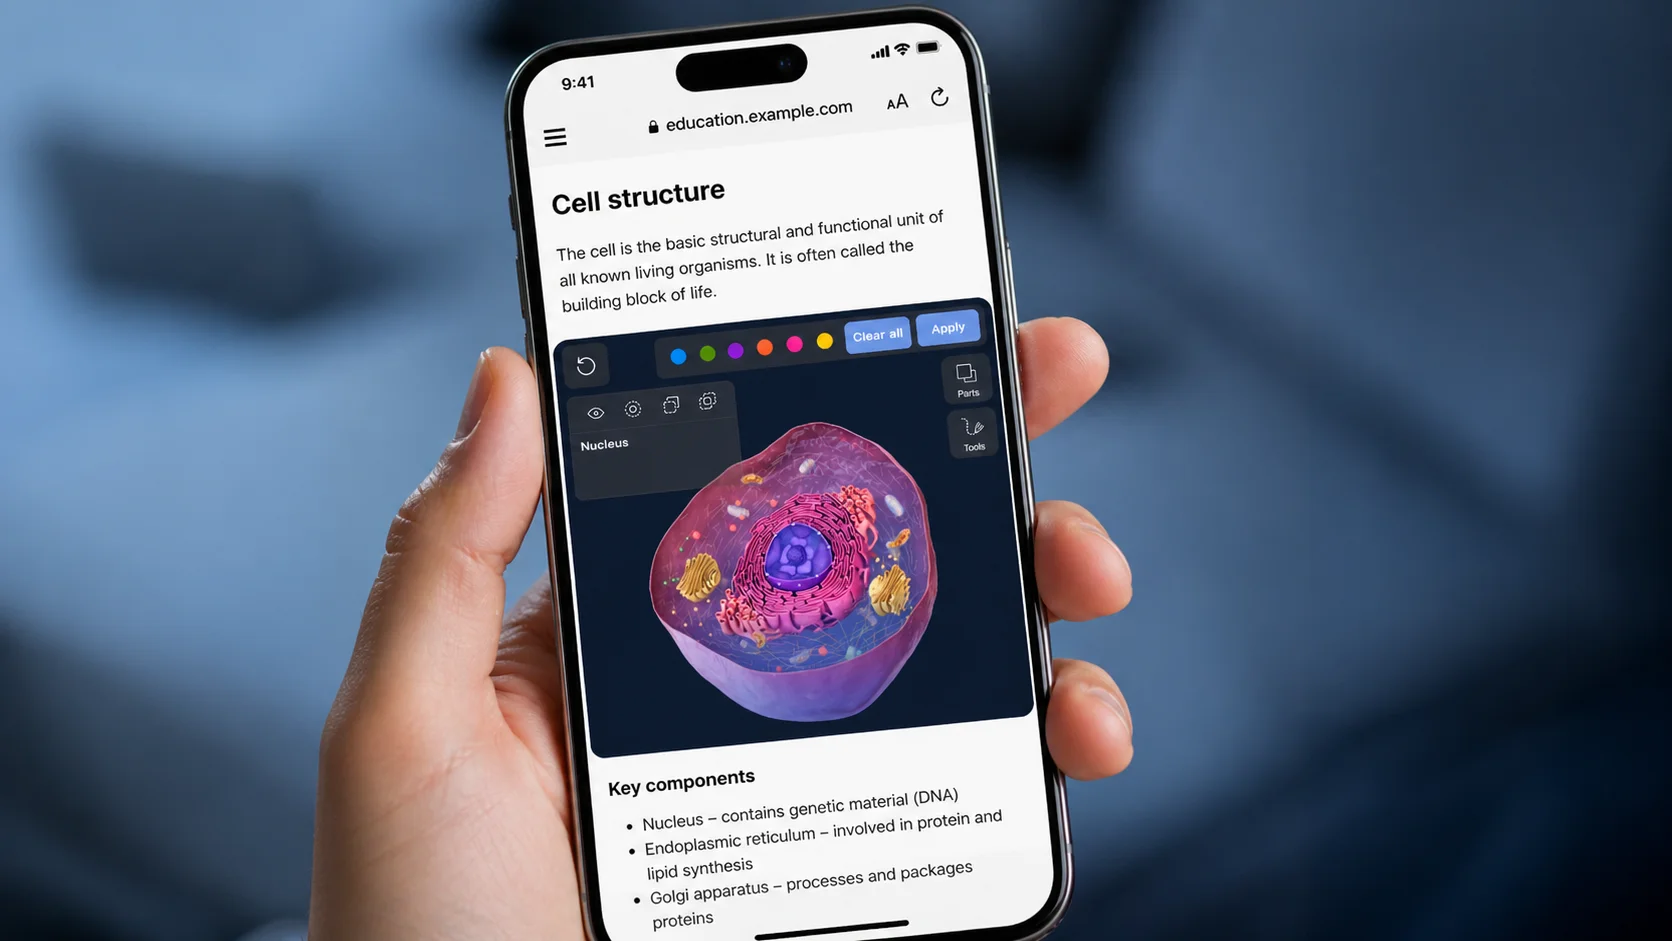
Unlike images or videos, iframe modules offer a 360-degree, completely user-driven overview of a structure or process, allowing the user to investigate the content at their preferred pace.

For medical and educational platforms, this is a simple way to add interactive anatomy and pathology content without complex development. As a result, users can interact with the model in real time: rotate it, zoom in, and inspect structures directly on the page.
How VOKA’s iframe works
Our iframe solution makes advanced medical 3D content easy to deploy while giving clients full control over hosting and performance.
Unlike many competing solutions that rely on continuous API access or external streaming, VOKA provides a complete, standalone package whereby the client receives all necessary files and hosts them on their own infrastructure.
In practice, the iframe acts as a simple display window on your website, while the interactive 3D viewer itself runs from files stored on your server.
Why is it efficient? Because there’s no vendor lock-in or dependency on external services after delivery.
Here’s what the integration process looks like with VOKA.
Step 1. We build the interactive 3D scene
Before a 3D viewer can go live, you need the 3D content itself.
It comes down to two options: you can pick a single model or a themed package of multiple models.
We suggest browsing VOKA’s extensive library of ready-made 3D models or, if need be, requesting a custom asset tailored to your needs.
Once the 3D content is selected, we prepare a scene (e.g., a model of the human heart or a surgical tool) with Unity for smooth web-based use.
The viewer comes with built-in tools that let users interact with the model straight away, including:
-
Interactive controls: rotate 360°, zoom in and out, isolate or hide structures
-
2D & 3D pen tools to draw directly on the model
-
Dissection to visualise internal anatomy and pathology
-
Color highlight to draw attention to selected parts
If you’d like the viewer to match your platform’s style, extra customization is also possible:
-
Custom backgrounds
-
Brand colors and fonts
-
Light or dark mode
So, you can maintain brand identity across all platforms.
Step 2. We export it as a WebGL package
Once ready, the scene is exported as a WebGL build.
WebGL is a browser technology that allows high-performance 3D graphics to run directly in modern browsers without requiring users to install any software or plugins.
The final package typically includes:
-
Optimized 3D models
-
Materials and textures
-
JSON configuration files
-
Browser-ready build files
-
HTML launch page
All files are prepared for smooth loading and cross-platform compatibility.
Step 3. You host the files on your server
We then send the completed package to your team.
Depending on your platform, the delivery can include web, desktop, or mobile-ready files.
-
Web: runs in Chrome, Safari, Firefox, and Edge
-
Desktop: Windows (.exe, .dll) and macOS (.app, .dylib, Xcode project)
-
Mobile: iOS (Xcode project) and Android (.apk, .aab, Android Studio project with .so libraries)
Your developers receive and upload the files to your own hosting environment, cloud storage, or internal infrastructure. This gives you full ownership of deployment, uptime, and access management.
Unlike many third-party viewer platforms, your content doesn’t depend on an external vendor server.
Step 4. You add an iframe to your page
After hosting the files, you can embed the viewer into any website, app, LMS, or portal using a standard iframe.
The HTML snippet points to the hosted viewer page, allowing it to appear inside your platform.
A basic example looks like this:

If necessary, the VOKA team can provide step-by-step guidance so everything works correctly.
Step 5. Users interact directly on your platform
Once embedded, users can access the interactive 3D experience without leaving your platform.
There is no need to download software, open a separate app, or switch tabs. The 3D viewer appears as a seamless part of your digital environment.
Ready to launch a 3D viewer on your platform?
Let’s talkHow difficult is the iframe integration?
It’s much simpler than companies expect.
The 3D viewer works as a self-contained module that can be directly placed into your platform. Your current website or app structure stays intact while the 3D content is added as a new section.
What’s needed
To get started, teams only need a few basic elements:
-
A place on the page where the viewer will appear
-
The iframe embed code provided by VOKA
-
Preferred viewer dimensions (width and height)
-
Basic page styling to match your layout and responsive design
For many websites, this can be handled as part of a normal content update.
What’s not needed
A common misconception is that adding 3D functionality requires a large technical project. In practice, most iframe integrations do not require:
-
Building a custom 3D viewer from scratch
-
Developing a rendering engine or graphics system
-
Rebuilding your website structure
-
Launching a heavy backend development project
-
Creating specific mobile or desktop apps
Because the viewer is already built and optimized, your team skips the most time-consuming parts of custom development.
Instead of creating the technology, you simply place an existing solution into your platform.
Why you should consider iframe integration
Iframe integration removes many common barriers that slow projects down. Here are some of the main reasons teams choose this approach.
Fastest launch option
Embedding a 3D viewer via iframe shortens timelines and helps teams move faster.
There is no need to build a custom frontend or create a new product flow from scratch. Once the files are hosted, the viewer can be added with a simple embed code.
So, if speed matters, the iframe is the best first step.
Lowest development effort
Most of the technical work is already done before delivery.
Your team doesn’t need to create a 3D engine, build viewer controls, or solve rendering challenges.
Implementation only requires placing the viewer on a page and adjusting layout settings. This reduces pressure on in-house developers.
Integration with your existing platform
Iframe is designed to fit into the systems you already use. It can be added to websites, apps, learning platforms, internal portals, and product pages.
You don’t need to rebuild your current platform to make space for 3D content. The viewer appears as part of the page while staying technically separate in the background.
Scalable later
Starting with an iframe doesn’t limit your future options.
Many companies begin with a simple embedded viewer and expand later based on user feedback and business goals. You can add more models and create new pages over time.
This lets you start small and scale when ready. It’s a flexible path forward.
Ideal before deeper custom integration
Not every company needs a fully customized solution on day one.
Iframe integration gives you a fast way to launch first, learn how users interact with the content, and understand what features matter most. It lowers risk before investing in deeper technical work.
How different teams use 3D viewers
Interactive 3D content can be useful across many fields where complex information needs to be explained clearly. Here are some of the most common ways medtech developers use our embeddable 3D viewer.
Educational platforms (LMS)
Universities, training centers, and eLearning platforms embed our 3D anatomy viewer to make lessons more visual and engaging.
Students can rotate models, explore anatomy layer by layer, and learn at their own pace. Compared to static diagrams or textbooks, this format improves anatomy learning.
Clinics & healthcare providers
Clinics add our 3D viewer to websites or patient portals to explain diagnoses and treatments more clearly.
People often understand visual explanations faster than written descriptions alone. This can improve patient communication and build trust before consultations or treatment.
Marketing & communications
Interactive 3D content helps marketing teams create stronger landing pages and product presentations.
Instead of using simple images, companies can show devices, anatomy, or pathologies in three dimensions. Interactive elements encourage visitors to spend more time on pages, which improves campaign performance and retention.
Plus, teams can embed the 3D viewer into platforms and presentation materials for promo events to attract attention and demonstrate products without physical prototypes.
Medical bloggers & publishers
Content creators can use our 3D viewer to make articles more informative and memorable.
Readers can explore the topic in 3D inside the page. This works especially well for anatomy explainers, health education, and medical news content.
And let’s be honest, not every article has an embedded iframe, so it’s also a great opportunity to stand out online.
Wrapping up
Embedding a 3D model viewer isn’t a complex technical project anymore. With an iframe, you can add interactive medical content without rebuilding your existing platform.
It’s a practical way to make complex information easier to understand, improve user engagement, and upgrade the overall experience of your digital product.
If you are planning your next step, the key question is not “if” you should use 3D, but how quickly you want to bring it into your platform. Ready to move forward? Contact the VOKA team, and we’ll help you get started right away!
FAQ
1. How to embed a 3D model viewer on a website?
You usually embed a 3D model viewer using a simple iframe code. Once the viewer is hosted, you just paste the iframe into your page where you want the 3D model to appear. No rebuilding of your website is needed.
2. Can I use a 3D model viewer in any browser?
Yes, our 3D viewer is based on WebGL and works in all major browsers like Chrome, Safari, Firefox, and Edge. They also run on mobile devices, as long as the browser is up to date.
3. Do I need coding skills to embed a 3D model viewer?
Basic HTML is usually enough. In most cases, you only need to copy and paste an iframe snippet into your website or CMS. No advanced development is required.
4. Do you provide ongoing support for the 3D viewer?
We provide the full viewer package to the client, which means there is no subscription or vendor lock-in. Once the files are delivered and implemented, the solution runs independently on your side. At the same time, we do support the initial setup by providing clear installation and integration instructions.
5. Can I add a 3D viewer to WordPress or Squarespace?
Yes. If your platform allows custom HTML or embed blocks, the viewer can usually be added with a standard iframe code. Popular website builders such as WordPress and Squarespace commonly support this setup.
Share
Table of contents
Thank you for your comment!
Your comment has been submitted for moderation and will be published soon. We'll email you once it’s live.